
Deck Board Fixing
Fixing your decking boards to the joist… different methods explained.
Deck board fixing, whilst there are many ways to mechanically fix your deck board to the timber frame or substructure; I would be concerned with the best fixing, budget and expected longevity rather than aesthetics.
Quite simply put, if you can’t afford everything you want there has to be a scale of importance when constructing a deck. From the most important to the least and possibly the best way to apportion costs when considering cutting corners.
Decking fixing methods
Screws are the obvious choice and there are several other methods to attach your decking boards. There are side clips in either plastic or stainless, there are also boards that fix from underneath
Deck fixing tips
1. Always choose the best side fixing, if you can’t afford stainless do consider how long a plastic fixing will last, do ask about the warranty.
2. When choosing the screw to attach your side fixing clip, why even for a second choose a cheap inferior screw over a stainless premium screw. An expensive deck plus the fixing clip which is also expensive and fixing it with a screw that will fail is something that simply should not be considered. If you have a side fixed decking system always use the best stainless screws.
3. If a side fixed system is not required the screw choice is vital to the longevity of the deck. If a softwood timber deck is used then a coated screw will be fine, for hardwoods and certain softwoods (e.g. Cedar) stainless screws are vital to guarantee a good fixing.
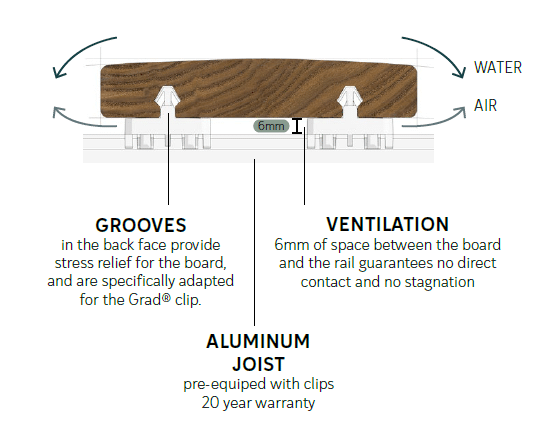
4. For a premium fixing system you should consider GRAD Concept, its is an aluminium frame system pre loaded with clips. These fix the decking to the substructure from underneath with a clever system of clips
5. Any timber can be sanded and oiled once complete and the fixings won’t even be considered. The client will not realise the quality of the fixing until it’s too late and the decking fails due to poor product selection.
6. The size of the screw is also important, with a side fixed system; the screw need only satisfy the mechanical fixing between the fixing clip and the joist so in most cases a slightly smaller screw than expected can be used.
In most cases, 4mm x 45mm would be adequate for a side fixing clip system.
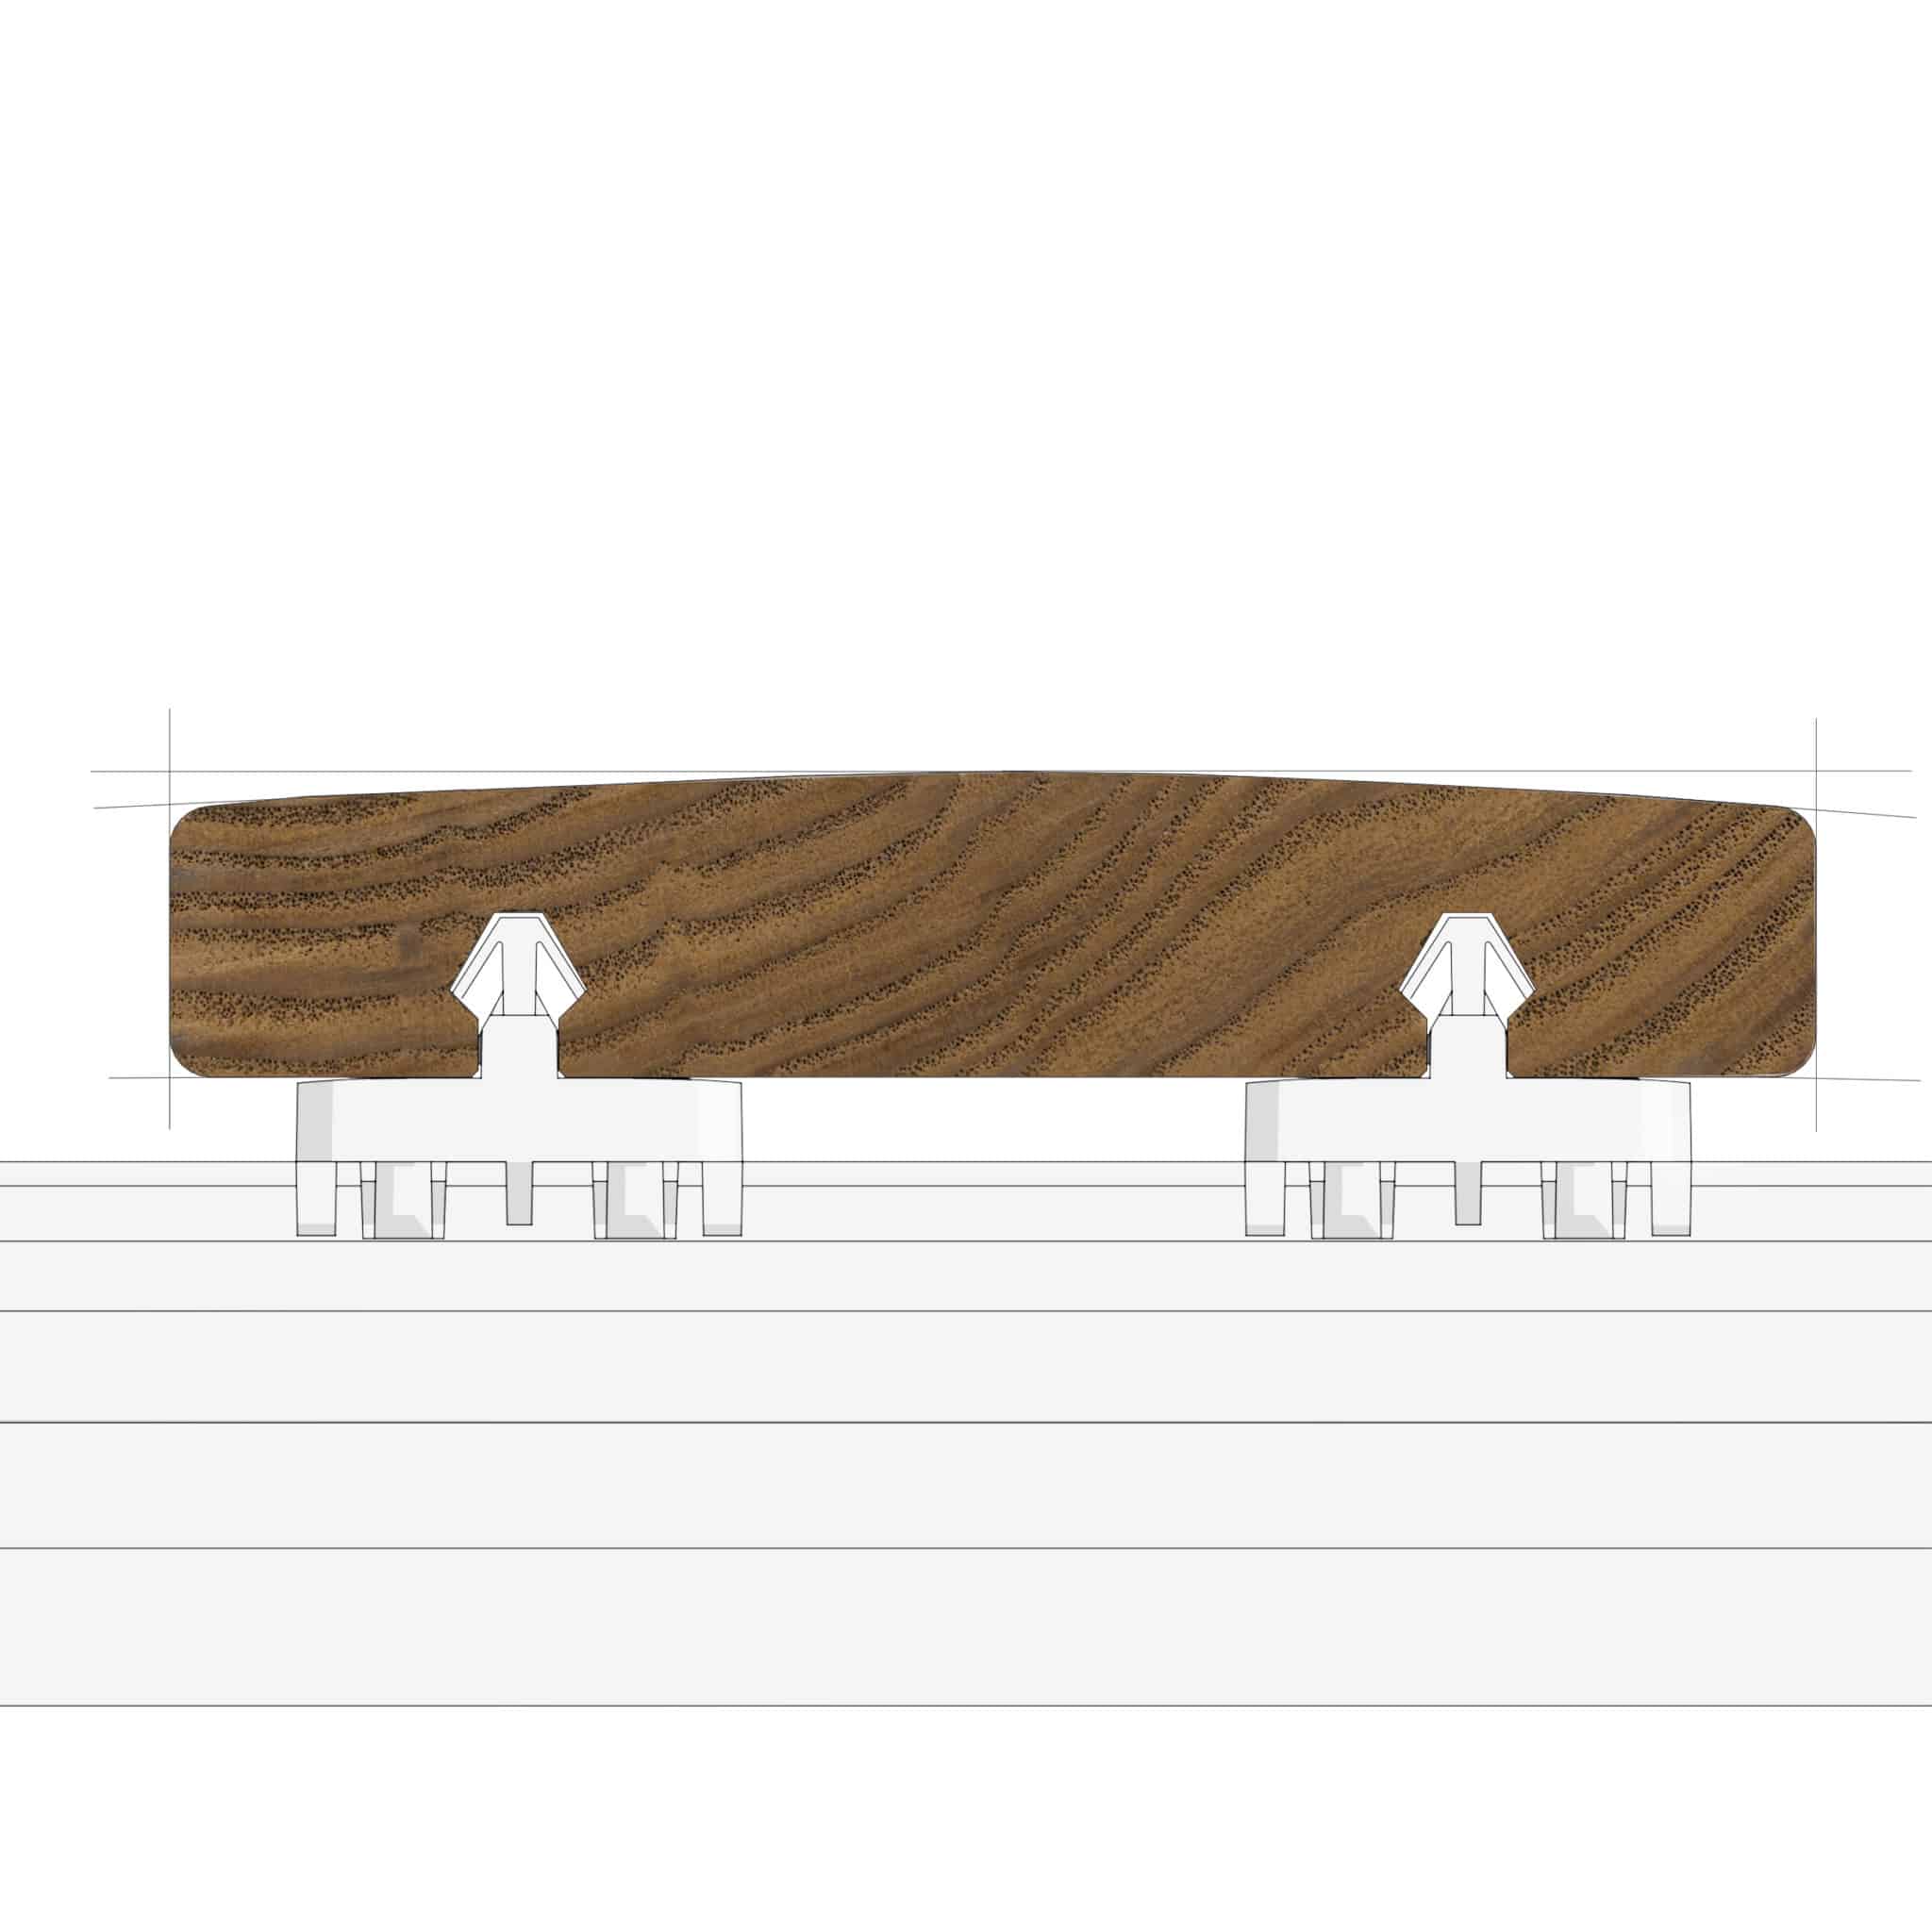
Dimensions for a timber board fixed from underneath
Grad Concept UK supply a patented system that has been proven to the be the longest lasting timber decking system on the market. Its an aluminium joist system preloaded with clips. Its these clips that secure the decking in place from underneath. The nominal size for these natural timber boards are 120mm wide and 21mm thick. Other dimensions are available on request
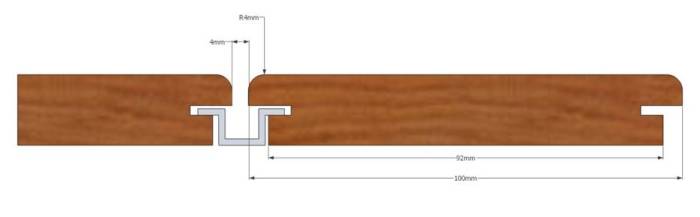
Dimensions of a timber decking board with side fixed system
Timber decking of all species, hard or softwood timber included, will want to expand when wet and cold. They’ll contract and shrink when hot and dry, most importantly cup and twist when transitioning between these conditions.
Considering conventional timber decking sizing, it is becoming increasingly apparent that with these 21mm x 145mm and wider width boards cupping can be an issue and with the incorrect span twisting can also be an issue. NB when your timber deck has warped, twisted or cupped you need to replace these boards as they will seldom move back or be moved back by other mechanical means without leaving the deck looking unsightly…
Reduced width boards have been accepted for general use for decking projects for many years; boards from 90mm to 130mm at 21mm thickness are being used to reduce waste during the manufacturing process and most importantly reduce cupping and warping. If a wider board is required with a side fixed system then a thicker timber must be used. There are 28mm and 35mm thickness boards available in different species at wider boards to facilitate the designers wish for boards up to 160mm width.
Solid hardwood timber decking of special cross-section with a smooth surface and rounded-off lateral edges to facilitate underfoot comfort, even barefoot. The absence of superficial fixture holes minimizes the risk of splinters. this also helps stop fissures from forming which could potentially be hazardous to users.
Dimensions of a timber decking board with traditional screw fixing
Timber decking that is traditionally fixed is still the most common fixing method used when constructing a timber deck. The emphasis on quality screw selection is vital to ensuring the longevity of the installation. The dimension of the screw and screw-type is also very important. The common issue is screws of diameter that is too thin or that the screw is simply not long enough.
The natural force exerted when a piece of timber is fixed in an exterior application is quite massive; tonnes in fact and if a piece of timber wants to expand – in most cases quite simply put it will! That’s unless the mechanical fixing is of substantial quality and dimension to prevent this. The following table is for hardwood decking.
The golden rule
“Screws when placed through the surface of the timber should be three time the thickness of the timber. Assuming a 21mm decking board then the screws would be 63mm long”
Timber dimension Screw dimension
21mm x 145mm 4.5 to 5mm x 63mm
28mm x 145mm 5 to 5.5mm x 75mm
35mm x 160mm 5.5mm x 90mm
NB be sure to pre-drill to 2mm wider than the screw to allow for expansion post-installation and countersinking is also required. It is advisable to countersink 2mm below the decking surface to allow for sanding the surface without affecting the screws. Only nip up the screws as the deck will expand as soon as the transpiration takes effect. The moisture content of the deck board increases thus the decking board expands so the fixings will tighten naturally.
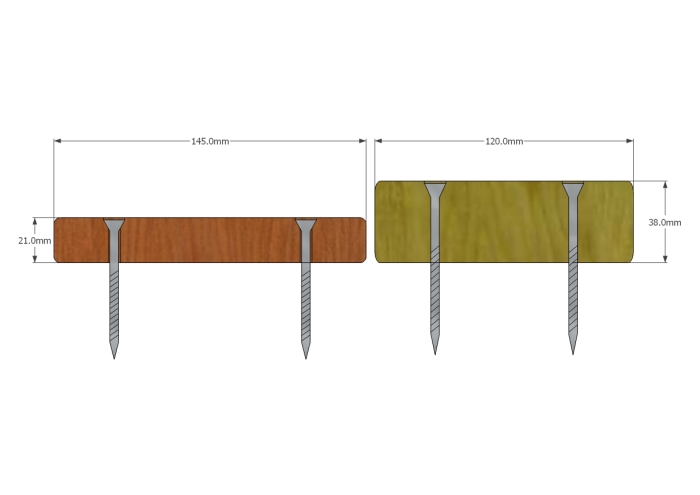
Positioning the decking screw in the deck board
In all cases, two screws should be applied on every substructure joist fixing point. Any single fixing will result in severe cupping and twisted boards. Screws should be positioned 20% of the total board width from the outside edge of the board. So in a 145mm width board, the screws should be set 28/29mm from the outside edge of the board. At the board ends the higher quality projects have a double joist so the same calculation or if there is only a single joist a 45-degree angle should be adopted at the same distance. This is because even if the board doesn’t split/crack on installation it will over time. To avoid splitting at the board ends pre-drilling is essential.
For a true timber lovers deck, a rebated hole was created for the screw with a router. Then plugged with the same timber materials (produced from offcuts). It is a timely affair to produce but looks amazing when sanded and oiled…
Decking guidelines by the Association of Professional Landscapers
Anyone can download the decking guidelines from the Association freely here
There are many standard industry guidelines for construction updated regularly and can be found via the Association of Professional Landscapers.